
Your fridge runs almost nonstop, condensation keeps appearing on the walls, and the milk never feels quite cold enough. Before you blame the compressor or start pricing a new refrigerator, check the rubber seal around the door. A worn door gasket is one of the most common reasons a fridge works too hard, and a refrigerator door gasket replacement is one of the most approachable repairs a homeowner can do.
The gasket is the flexible rubber strip around the inside edge of the fridge and freezer doors. Every time you close the door, it compresses against the cabinet and seals cold air in and warm, humid room air out. This guide covers the whole job in order: testing whether the seal is really the problem, measuring for a gasket that fits, what the job costs, removing the old seal and installing the new one, and testing your work afterwards.
What the Door Gasket Actually Does
Think of the gasket as a door weatherstrip that also has to survive cold, moisture, and being pulled open dozens of times a day. Most modern gaskets contain a magnetic strip that pulls the door firmly shut, plus flexible folds that compress to fill the gap between door and cabinet.
That seal matters for three reasons. First, it keeps cold air inside, so the compressor cycles normally instead of running constantly. Second, it keeps warm, humid air out, which means less condensation and less frost. Third, it protects your food: a fridge that cannot hold temperature spoils food faster.
A gasket does not last forever. Heat, cleaning products, food spills, and years of flexing slowly harden the rubber, and a seal that once sprang back when pressed stays flat instead. Corners pull away, small tears open along the folds, and the problem creeps up: the fridge gets a little louder and the food a little less cold, month by month.
Signs Your Gasket Is Failing
You do not need tools to spot most of the warning signs. Open the door and run a finger slowly around the whole gasket. Look for cracks, tears, flattened sections, and places where the rubber has pulled out of its channel. Check the corners closely, since they take the most stress and usually fail first.
Next, look for the symptoms a leaking seal causes. Condensation on the inside walls is a classic sign, especially in a humid kitchen. Frost around the freezer door opening, rather than evenly across the back wall, also points to the seal. So does a fridge that runs almost constantly.
Another clue is temperature. Put a fridge thermometer on a middle shelf and leave the door closed for at least four hours. The US Food and Drug Administration recommends a refrigerator at or below 40°F and a freezer at 0°F.
How to Test the Seal Properly: The Dollar-Bill Test
The paper test is often called the dollar-bill test, and it is the most useful check you can do before ordering a part. A dollar bill is thin, flexible, and about the right stiffness to reveal a weak seal without damaging anything.
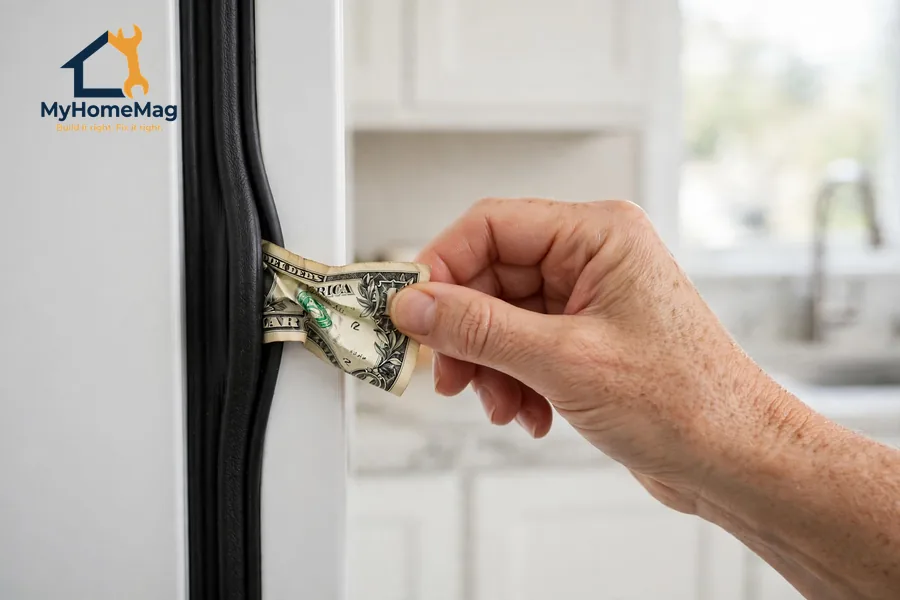
Close the door on the bill so that half sticks out, then pull it slowly toward you. A healthy seal grips the bill firmly all the way around the door. Test the top edge, both sides, and the bottom, and test the freezer door the same way. Mark any spot where the bill slides out with little or no resistance.
A bill that slips easily in one small area does not always mean the whole gasket is finished — sometimes a corner has pulled loose and can be pushed back into its channel. But if the bill slides out easily in several places, or the gasket feels hard and brittle, replacement is the honest answer. No cleaning restores rubber that has gone hard or torn.
There is a second useful check, the flashlight test. At night, place a switched-on flashlight inside the fridge, close the door, and look for light leaking out around the edges. One more check costs nothing: clean the gasket with warm, soapy water first, then test again. Sticky spills can hold a door slightly open and mimic a failed seal. If the tests still fail after cleaning, you have a real gasket problem.
Is It Really the Gasket? How to Tell It Apart from Other Problems
A weak seal causes warm air to leak in, but so do several other faults, and replacing a good gasket will not fix them. Before you order anything, rule out the look-alikes.
Water pooling or leaking inside the fridge usually comes from a blocked defrost drain, a cracked water filter housing, or a defrost problem — not the door seal. Heavy frost in the freezer may come from the defrost system, a door left open, or warm air entering; frost spread evenly across the back wall usually points to the defrost system, while frost around the door opening points more strongly to the seal.
If the fridge is not cooling at all while the freezer works, the problem is more likely airflow: a failed evaporator fan, a stuck damper, or dirty condenser coils. The pattern that most clearly points to the gasket is a fridge that cools, but works too hard to do it: steady running, condensation, mild frost near the door, and a failed dollar-bill test.
Measuring for a Gasket That Fits
Fit is everything in this job. A gasket that is even slightly the wrong size will not seal, however carefully you install it. Take your time here, because the measuring stage is where most fridge gasket repair jobs go wrong.
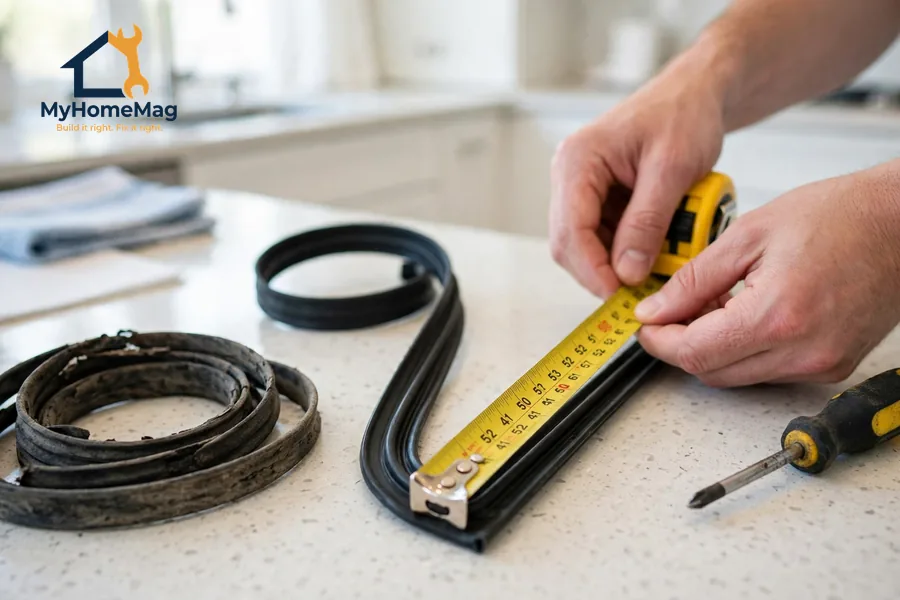
Start with the model number. Find the rating plate inside the fresh-food section, usually on the upper side wall, or on the inside of the door itself. Write down the full model number and the brand. Order by that number whenever you can: a manufacturer gasket made for your model is the safest fit, with the right magnetic strip, profile, and mounting style already built in.
Then measure the door itself — outside height and width, not the old gasket — and measure the old gasket laid flat. Compare both sets of numbers against the replacement part’s stated dimensions before ordering. A new gasket should match the door within about a quarter inch; more than that means the wrong part.
| Gasket type | How it attaches | Common on |
| Push-in / press-in | Dart edge presses into a channel | Most modern models |
| Screw-in | Screws hold a retainer strip over the gasket edge | Older and side-by-side models |
| Magnetic, snap-in | Magnetic strip snaps against the cabinet | Newer French-door and bottom-freezer models |
| Foam or adhesive-backed | Foam strip with adhesive | Compact fridges and older models |
When you compare parts, check the profile (the cross-section shape of the folds), the mounting style, and whether the part includes the magnetic strip. If the supplier lists your model number as compatible, trust that over a visual match. An original manufacturer part is usually worth the difference over a cheaper universal one.
Also check the door itself before ordering. A door that has sagged on worn hinges will not seal even with a brand-new gasket, so lift it gently: if it moves up and down, the hinges may need adjusting first. And check that the fridge is level.
What a Refrigerator Door Gasket Replacement Costs
All figures below are approximate US planning ranges, not quotes. Get a written estimate before authorising professional work.
| Option | Approximate US range |
| Gasket part only (DIY) | $50–$200, depending on brand and model |
| Professional installation, top-freezer model | $100–$200 installed |
| Professional installation, French-door or side-by-side model | $150–$250 installed |
| Door hinge adjustment, if needed first | $75–$150 |
For most fridges under ten years old, a gasket replacement is worth doing. Compare it with the cost of the energy a leaking seal wastes and the food it spoils: a $150 repair that restores a proper seal usually pays for itself well before the fridge needs replacing.
Before You Start: Tools and Safety
You will need the new gasket, a Phillips screwdriver, a nut driver if your model uses hex screws, warm soapy water, towels, and a fridge thermometer.
Unplug the fridge before you remove anything. Move perishable food into a cooler with ice: perishable food should not stay above 40°F for more than two hours, so work steadily. Wear gloves if the old gasket is mouldy or has sharp, hardened edges.
Removing the Old Gasket
For a push-in gasket, start at a top corner and pull the dart edge firmly out of its channel, working your way around the door. For a screw-in gasket, loosen the screws along one side at a time and lift the retainer strip just enough to free the gasket — do not remove all the screws at once, or the door liner can shift. Note how the old gasket sits before you remove it: which side faces out, and where the corners fall. A quick phone photo helps. Clean the empty channel with warm, soapy water and dry it completely before fitting the new seal.
Installing the New Gasket
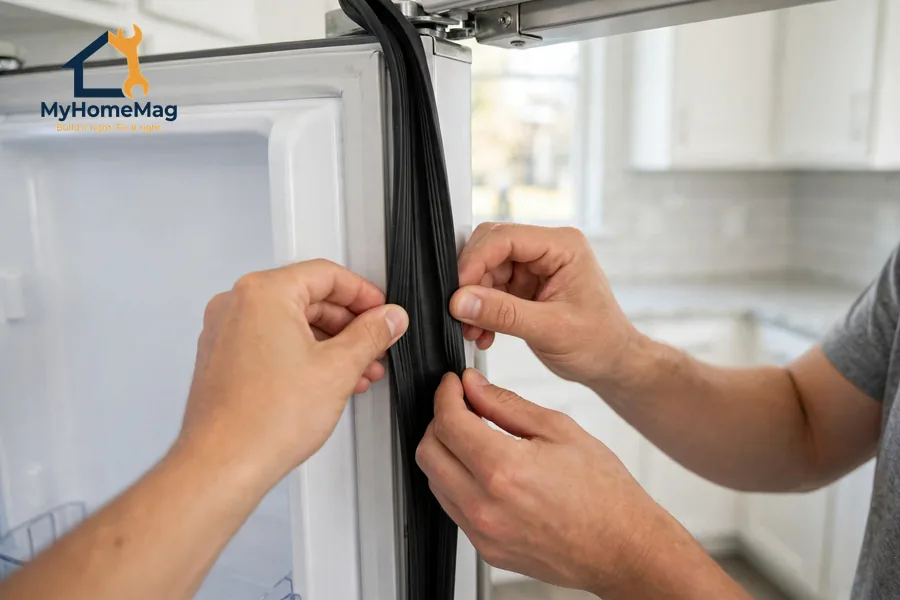
New gaskets often arrive folded or rolled, and a creased gasket will not seal. Soak the new gasket in warm water for ten to fifteen minutes first, then dry it and let it relax flat. Start at the top corners, pressing the dart edge firmly into the channel, and work down both sides, then across the bottom. For a screw-in gasket, tighten the screws in sections as you go, snug but not overtightened — crushing the gasket creates new gaps. Close the door and check that the gasket sits flat all the way around, with no twists or bunched corners.
Testing the New Seal
Plug the fridge back in and run the dollar-bill test again at several points around the door. The bill should grip firmly everywhere. If one spot is still weak, press that section of gasket into the channel again, or warm it gently with a hair dryer on a low setting and press it flat while it cools. Then put a thermometer on a middle shelf, close the door, and check after four hours: the fridge should be at or below 40°F and holding steady. Watch for condensation over the next day — it should fade as the seal beds in. Retest after 24 hours before deciding the job is done.
Mistakes to Avoid, and When to Call a Professional
The most common mistakes are ordering by looks instead of model number, installing a cold, creased gasket straight from the box, overtightening the screws, and skipping the retest. Any of these can leave you with a new gasket that still leaks. Take the extra ten minutes to warm the gasket and test your work.
Call a professional if the door is bent or the liner is cracked, the hinges are worn and the door sags, or the fridge still will not hold temperature after a correctly fitted new gasket. Those point to a door or cooling-system problem, not a seal problem. If the fridge is under warranty, check the terms first — a DIY gasket replacement can affect coverage on some models. Sealed-system work, including anything involving refrigerant or the compressor, is never a DIY job.
Keeping the New Gasket Healthy
Clean the gasket every few months with warm, soapy water, and dry the folds where moisture collects. Avoid harsh cleaners and bleach, which harden rubber. Do not hang heavy items from the door shelves, and close the door with a firm push rather than a slam. A quick dollar-bill test once a year will catch the next seal before it starts costing you food and energy.
Frequently Asked Questions
How do I know if my refrigerator door gasket needs replacing?
Run the dollar-bill test around the whole door. If the bill slides out easily in several places, or the gasket is torn, hard, or flattened, it needs replacing. Condensation inside the fridge and a compressor that runs constantly are supporting signs.
Can I replace fridge door seal myself?
Yes, for most push-in and screw-in gaskets. Unplug the fridge, remove the old seal, warm the new gasket in water, press it into the channel starting at the top corners, and retest with the dollar-bill test. If the door is bent or the hinges are worn, call a professional.
How much does a refrigerator door gasket replacement cost?
The part alone usually costs about $50–$200, depending on brand and model. Professional installation typically brings the total to roughly $100–$250. These are approximate US planning ranges, not quotes.
How long does a new refrigerator door gasket last?
A new gasket typically lasts several years with basic care: regular cleaning with warm, soapy water, no harsh chemicals, and a yearly dollar-bill test. Heat, spills, and slamming the door shorten its life.
Related Guides
- MyHomeMag
- Appliance Guides
- Fridge Not Cooling but Freezer Works? Causes and Safe Checks
- Refrigerator Leaking Water Inside? Causes and Safe Fixes
- Dishwasher Not Draining? Causes, Fixes, and When to Call a Pro
- Washing Machine Leaking: Find the Source, Stop the Water, and Fix It Safely
- Ice Maker Stopped Making Ice? Causes, Checks, and Safe Fixes
- Freezer Frosting Up? Causes, Defrost Steps, and Prevention
- Fridge Not Cold but Freezer Is? Checks to Try Before a Pro
- Water Stuck in Washing Machine? Why It Won’t Spin and What to Check
- Washing Machine Not Draining? Filter, Pump, and Hose Checks
- Dryer Not Heating? Electric and Gas Checks to Try First
- Dryer Takes Too Long to Dry? Vent and Airflow Fixes to Try
- Washing Machine Shaking Violently? Level It and Stop the Banging
4 Responses