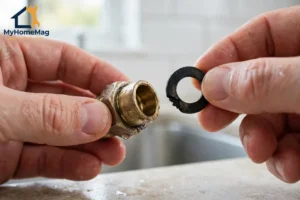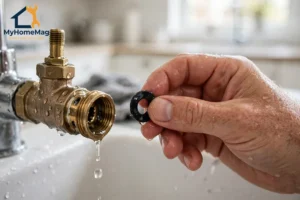
What Is an Anode Rod, and Why Does It Matter?
Inside almost every tank water heater, there is a long metal rod that most homeowners never see. It is called an anode rod, and its job is simple but important.
In short, the rod is designed to corrode so your tank does not have to.
Water, especially hard water, slowly attacks metal. Without protection, the inside of a steel tank would rust, weaken, and eventually leak. The anode rod acts as a sacrifice. It attracts that corrosion first, which buys your tank years of extra life.
Moreover, this small part explains why two identical water heaters can last very different lengths of time. One with a rod that is checked and replaced on time may last 12 to 15 years. Another, with a rod that has rusted away completely, may fail much sooner.
For example, a homeowner who notices rusty water or a rotten-egg smell may blame the water supply. In many cases, however, the real problem is a worn-out anode rod. Once it is gone, the tank itself becomes the next target.
That is why water heater anode rod replacement is one of the most useful, and most overlooked, home maintenance jobs. It is not glamorous, but it can save you from a flooded utility room and a sudden replacement bill. This guide is practical and US-focused, and part of MyHomeMag‘s Home Repairs guides.
How Do You Know the Rod Needs Replacing?
Most anode rods last three to five years, depending on water hardness, how much hot water your household uses, and whether you have a water softener. A softener, for instance, can wear a rod out faster.
However, you should not rely on the calendar alone. Look for these signs:
- Hot water that smells like rotten eggs, especially when it has not been used for a while
- Rust-colored or cloudy hot water, while cold water still looks clear
- Popping, rumbling, or banging sounds from the tank, which can point to sediment as well as corrosion
- A water heater that is more than five years old and has never had its rod checked
- A previous plumber’s note saying the rod was thin, pitted, or down to its steel core
If you see more than one of these signs, it is time to inspect the rod. Do not wait for a leak. By the time a tank leaks from the bottom, the damage is usually done, and replacement is the only safe option.
Which Type of Anode Rod Should You Choose?
Not all anode rods are the same. The three common types are magnesium, aluminum, and powered, or impressed-current, rods. Each suits a different home.
| Anode rod type | Best for | Things to watch |
|---|---|---|
| Magnesium | Most homes with normal or soft water; the most common factory choice | Wears faster in hard water or with a softener; can increase sulfur smell in some wells |
| Aluminum | Hard water and homes where magnesium causes odor | Slightly less protective in some conditions; heavier to handle |
| Aluminum-zinc alloy | Homes with a sulfur or rotten-egg smell | A good middle ground, but check compatibility with your heater model |
| Powered (impressed-current) | Homes that go through rods quickly; no need to replace the rod itself | Costs more upfront; needs a power outlet and a working controller |
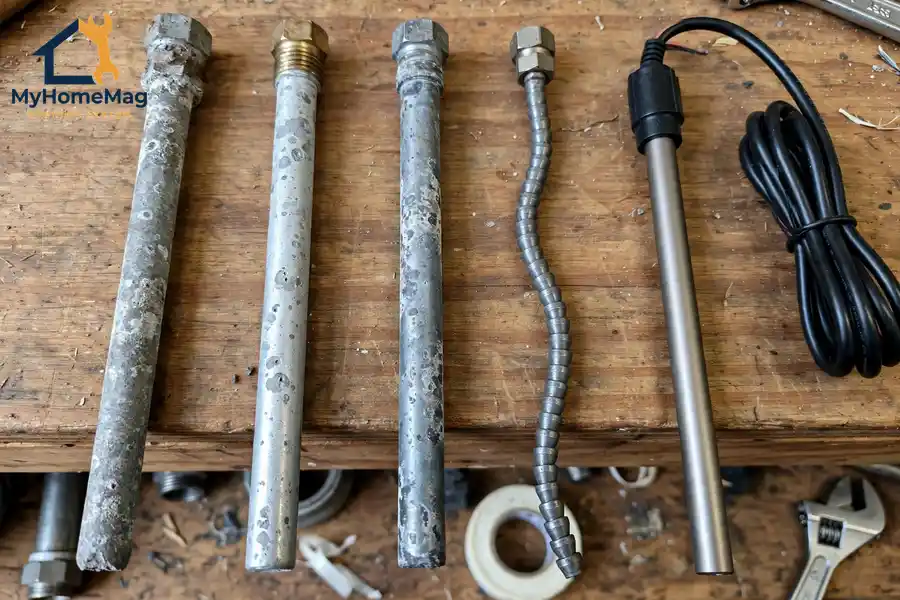
In short, if you are unsure, match what was in the heater originally, or check the heater manual. Using the wrong length is a common mistake. A rod that is too long will not fit, and one that is too short will leave part of the tank unprotected.
For example, many tall tanks need a 44-inch rod, while shorter tanks use a 33-inch rod. Some tight spaces, such as a heater under a low ceiling, need a flexible, segmented rod that bends as you feed it in. Measure the space above your heater before you buy anything.
Safety First: Read This Before You Touch the Heater
Water heater work involves hot water, pressure, and either electricity or gas. Take this seriously.
Use this checklist before you start, and stop if anything does not feel safe:
- Turn the power or gas off. For an electric heater, switch off the breaker labeled for the water heater. For a gas heater, turn the gas control to pilot or off, following the label on the unit.
- Shut the cold water supply off. Find the cold inlet valve on top of the heater and close it.
- Let the water cool. Wait several hours after switching the heater off, or run a hot tap until the water is only warm. Never open a tank full of scalding water.
- Relieve pressure carefully. Open a hot water tap somewhere in the house, then lift the temperature and pressure relief valve lever briefly, keeping your hands and face clear. If the valve drips afterwards or will not reseat, stop and call a professional.
- Never work on a pressurized tank. If water is still coming out under pressure, or you cannot confirm the power and gas are off, do not remove the rod.
- Do not work alone on gas. If you smell gas at any point, leave the area, do not switch lights on or off, and call your gas provider or emergency number from outside.
Moreover, if your heater is in a tight closet, on a high platform, or connected in a way you do not understand, this is a job for a plumber. A correct rod replacement should take an hour or less for a professional, and it is far cheaper than a burst tank.
Water Heater Anode Rod Replacement, Step by Step
Once the heater is cool, depressurized, and switched off, you can work through these steps in order.
1. Gather your tools and the right rod
You will need a 1-1/16 inch socket, a breaker bar or a long ratchet for leverage, thread seal tape, a garden hose, and a bucket. Have the new rod ready, and confirm it is the right length and type for your model.
2. Drain a little water, not the whole tank
You do not need to empty the tank completely. Attach a hose to the drain valve at the bottom, run it to a safe drain or outside, and drain just enough water to drop the level below the top of the tank. This is usually a few gallons.
However, if the drain valve is stuck, corroded, or starts to leak, stop. Forcing it can break the valve and leave you with a bigger problem.
3. Find and loosen the old rod
The anode rod is usually on top of the heater, under a plastic cap or a hex head. In some models, it is combined with the hot water outlet. Check your manual first, because the location varies.
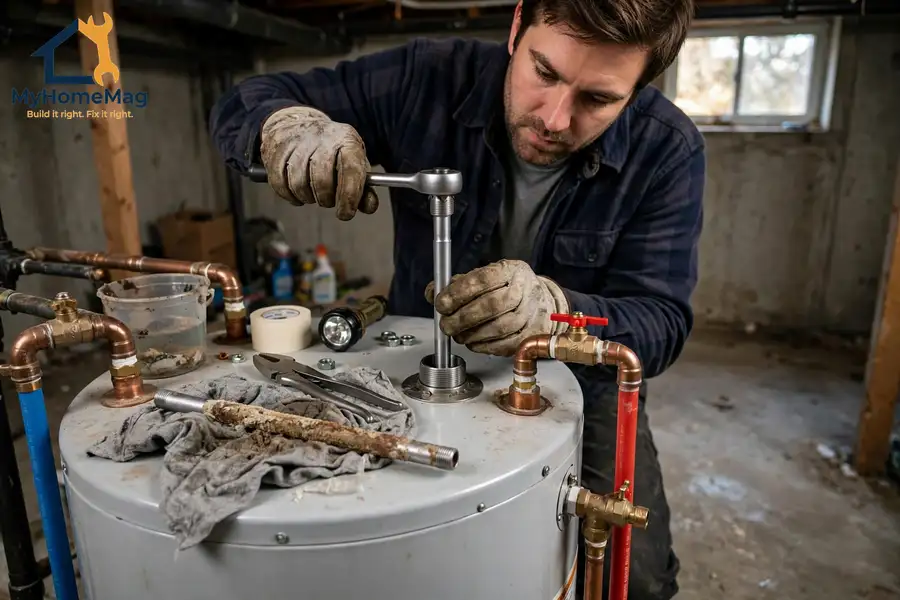
Use the socket and breaker bar to loosen the hex head. It may be very tight after years in place. Apply steady pressure rather than sudden jerks, and keep the socket square so it does not slip.
4. Pull the old rod out and inspect it
Lift the rod straight up and out. In a low-ceiling space, you may need to tilt it or use a flexible rod for the replacement. Look at what comes out.
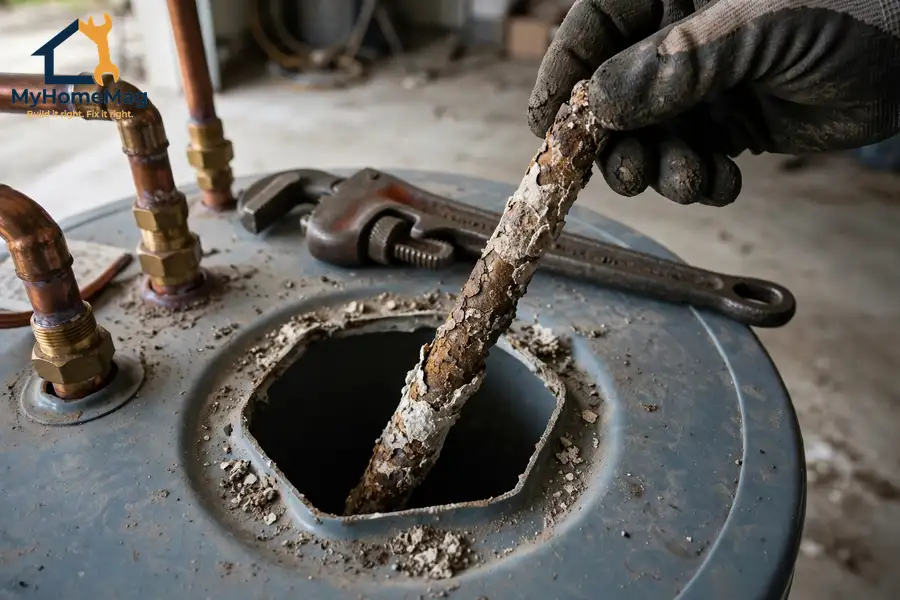
A healthy rod still has a thick layer of magnesium or aluminum around a steel core wire. A worn rod looks thin, pitted, or eaten away, with much of the core wire showing. If more than about half the coating is gone, or the core is visible along most of its length, replacement was overdue.
For example, a rod that comes out as little more than a thin wire has done its job, but it has nothing left to give. Put the new rod in straight away.
5. Fit the new rod
Wrap the threads of the new rod with thread seal tape, following the direction of the threads. Lower it gently into the tank, taking care not to cross-thread it. Tighten it firmly with the socket, but do not over-tighten and crack the fitting.
6. Refill, check for leaks, and switch back on
Close the drain valve and remove the hose. Open the cold water supply slowly, and leave a hot tap open until water runs steadily without sputtering. This tells you the tank is full again.
Check around the new rod and the drain valve for drips. If you see a leak at the rod fitting, tighten it slightly. If it still leaks, switch the water off again and call a professional.
Only when the tank is full should you switch the power or gas back on. Turning an electric heater on while it is empty can burn out the heating elements in seconds. For gas, relight the pilot exactly as the label instructs, and check that the burner lights normally.
Finally, run the hot water for a few minutes and check again for leaks. Mark the date of the replacement on the heater or in your home maintenance notes, so you know when to check it next.
How Much Does It Cost?
Costs vary by region, heater type, and whether you do the work yourself or hire a plumber. The figures below are approximate US planning ranges, not quotes.
| Option | Approximate US planning range |
|---|---|
| Magnesium or aluminum rod, part only | $25 to $75 |
| Flexible segmented rod, part only | $50 to $110 |
| Powered anode rod, part only | $150 to $300 |
| Plumber to replace a standard rod | $200 to $450 |
| Plumber, difficult access or seized fitting | $350 to $650 |
In short, the part itself is inexpensive compared with a new water heater, which can cost $1,500 to $3,500 or more installed. That is the real saving. Spending a few hundred dollars on a rod can protect a tank worth many times that amount.
However, do not choose the cheapest rod if it is the wrong type or length for your heater. A poor fit protects nothing, and a seized or broken fitting can turn a simple job into an emergency call.
When to Call a Professional
Water heater anode rod replacement is a sensible do-it-yourself job for many homeowners, but not for everyone. Call a plumber if:
- You cannot confirm the power or gas is safely off
- The old rod will not budge, or the fitting looks cracked or corroded
- The drain valve or relief valve leaks after you touch it
- You smell gas, see scorch marks, or notice water damage around the base
- Your heater is under warranty and the warranty requires professional service
- The tank is already leaking, rusted through, or more than 12 to 15 years old
For other water and appliance problems around the home, our guides to a dishwasher not draining and a washing machine leaking can help you find the source safely.
Moreover, a professional can check the whole system at the same time. That includes sediment flushing, the relief valve, the expansion tank if you have one, and the condition of the tank itself. Sometimes the honest advice is that a new heater, not a new rod, is the right spend.
A Small Part With a Big Job
It is easy to forget the anode rod because it is hidden inside the tank. Yet it is one of the few parts in a home that quietly sacrifices itself to protect something far more expensive.
Water heater anode rod replacement does not take long, it does not cost much compared with a new heater, and it gives you a clear picture of how your tank is ageing. Check it on time, replace it when it is worn, and call a professional when anything looks unsafe.
In short, look after the rod, and the tank will look after you for much longer.
Frequently Asked Questions
1. How often should I replace a water heater anode rod?
Most rods last three to five years, but hard water, heavy use, and water softeners can shorten that. Check the rod every two to three years, and replace it when more than about half of its coating is gone or the steel core is clearly showing.
2. Can I replace an anode rod myself?
Yes, if you can safely switch off the power or gas, shut off the water, let the tank cool, and relieve pressure first. However, if the fitting is seized, a valve leaks, you smell gas, or you are unsure at any point, stop and call a plumber.
3. What happens if I never replace the anode rod?
Once the rod is fully worn away, corrosion attacks the tank itself. That can lead to rusty water, leaks, and early tank failure. In many cases, a tank that could have lasted several more years fails sooner simply because the rod was never checked.
4. Does a water softener affect the anode rod?
Yes. Softened water can wear a magnesium rod out faster, so homes with softeners should check the rod more often. In some cases, an aluminum-zinc rod lasts longer, but check your heater manual and, if in doubt, ask a plumber.
5. How do I know if the rod or the tank is the problem?
If the rod is worn but the tank is not leaking and the water clears after replacement, the rod was likely the issue. If the tank itself leaks, especially from the bottom, or the steel shell is rusted through, a new rod will not fix it, and replacement of the heater is usually needed.